There is no better time than now to get creative in every way possible. One way to get those creative juices flowing is to take on a few small-scale projects and liven up your rooms with budget-friendly, eye-popping, easy-to-make DIY projects to keep you visually entertained at home. From starting that gallery that has been on the back burner for months to introducing a mini terrarium, here is a list of fun do-it-yourself projects to tackle at home.

Paint an Accent Wall
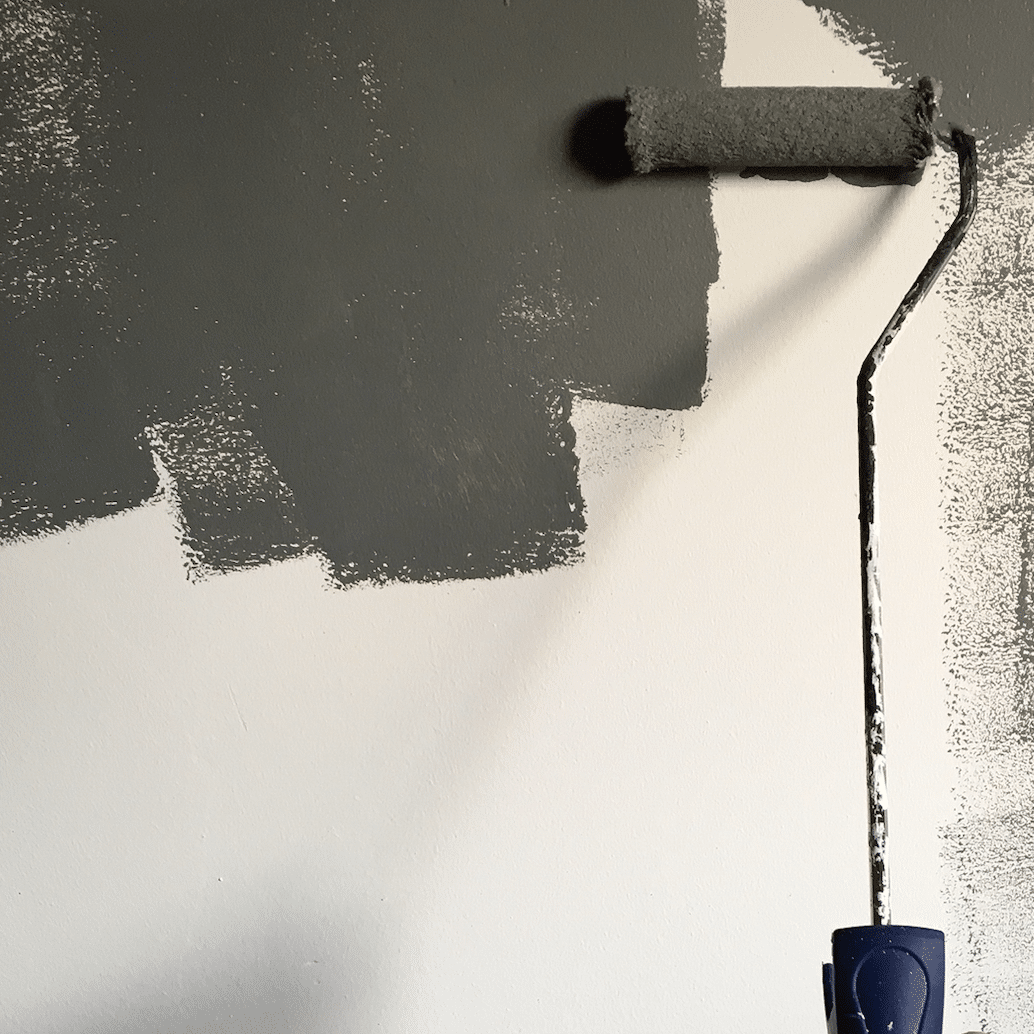
The easiest, cheapest, and most effective way to update your home is with a fresh coat of paint. If you’re not sure where to begin, consider an accent wall in one of your rooms. The best way to determine which wall to paint is to find the natural focal point in the room. Typically, it’s the first wall you notice when you walk into a room. For a bedroom, it’s usually the wall the bed is up against. For a living room, usually, the wall behind or facing the main couch. Colors convey energy and it’s important to choose one that communicates happiness. If you’re looking for a boost of energy, opt for vibrant, primary colors like orange or yellow to make the room pop. If you’re looking to add depth, a touch of luxury, or relaxing vibe, opt for dark blue or grey.
See More: 50 Things to Do at Home So You’re Never Bored
Reupholster Furniture
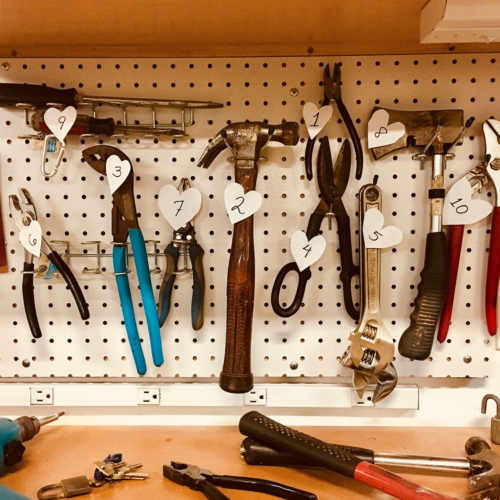
Purchasing new furniture can get expensive, especially if you’ve already invested a lot into your pieces or they hold sentimental value. Instead of replacing your chairs because of stains or rips, give them a facelift by replacing the fabric with a new one that sparks joy. Reupholstering is time-intensive, so it’s important to be committed to the project before you begin the process. First, choose a chair{s} that is made of solid wood. Attempting to use wood of lesser quality will most likely not last as long. Solid wood maintains its value. A good way to determine if your chairs are reupholster-worthy is by moving them around a bit to check for wobbles and noises. Next, choose a fabric that will transform your chairs and don’t be afraid to play with colors and fun designs but consider something timeless. However, because most fabrics aren’t sturdy enough for long-lasting furniture, upholstering fabric works best — and buy extra in case of mistakes. There aren’t any special tools required for the project, but you will need a flat-head screwdriver for prying, pliers, a hammer, a fabric staple gun, foam, and a sewing machine.


Create a Gallery Wall
Framing family photos or art is something everyone has on their to-do list that rarely ever gets done. A gallery wall is the perfect way to create a homey-feel in any room that you could be proud of. Before starting, it’s important to determine which wall will serve as the backdrop and if there will be a design theme. For example, will your frames be color coordinated or be different styles and sizes? For a uniform, sleek and modern look, opt for a gallery wall using the same colored and sized frames. For a fun, playful, and eclectic focal point in the room, use different colored frames of all sizes. If you have picture frames that you like but are lacking color, paint them to fit your design palette. Once your photos or art are already framed, and you have all of the frames needed to complete the gallery wall in one shot, you mock up the placement of the frames on the ground to confirm the perfect placing ahead of time. Start with the largest pieces first, then fill the gaps with the smaller ones. When hanging, keep the frames at eye-level, roughly 60 inches from the center of the mock layout. Then, begin hanging. For a dramatic look, create a floor-to-ceiling gallery wall.
Paint Your Decorative Pillows
Revive your throw pillows with a fresh new coat of paint. That’s right, painting pillows is a thing and it’s the perfect way to breathe new life into your rooms. If you have an appreciation for beautifully designed fabric, try your hand at it. This design takes less than an hour and creates a personal touch in your home. The project consists of two 22” x 54” strips of white cotton fabric, multi-surface or fabric craft paints in black, teal, bright pink, yellow and dusty pink, paintbrushes, adhesive-backed craft foam, blank wooden circles, scissors, iron, white thread, pins, measuring tape and a sewing machine. Step one, begin hand-painting symbols by using wide, flat brushes to create a brushstroke pattern or a pointed-tip paintbrush for fine designs, like small dots. Step two, make custom stamps by cutting out shapes of your choosing from the adhesive-backed foam. Step three, apply paint to a stamp using a paintbrush and stamp onto the fabric. Step four, once the paint has dried, trim each fabric strip down to 19” x 46”. Step five, fold ½” of fabric over twice on each of the 19” edges, then press into place with a hot iron. Step six, sew each of the folded ends about ¼” from the edge. Step seven, fold each of the sewn ends towards the center with the painted side of the fabric facing inward so that each end is overlapping by 8” and the total pillow cover is just less than 18” wide. Step eight, sew the top and bottom edges into place about ½” from the edge. Step nine, turn right side out, press, and finish with an 18” x 18” pillow insert.

Create a Floral Wreath
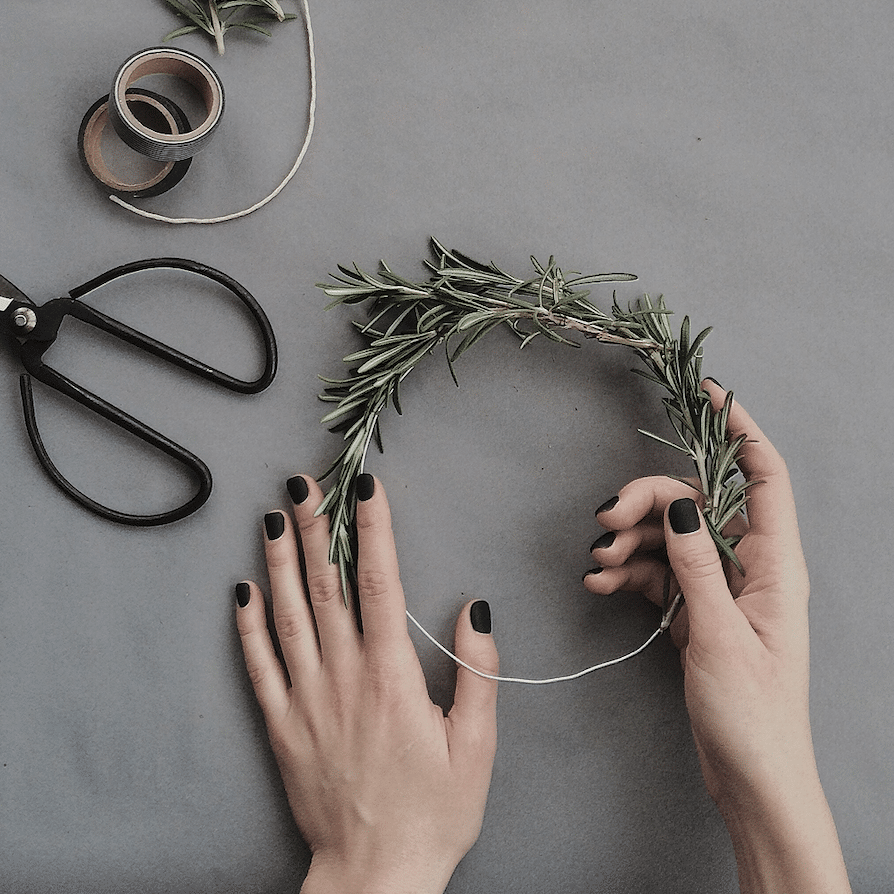
Create a chic, everlasting wreath for a minimalist and modern touch. Instead of using a chunky green wreath as a base, use a metal loop. Personalize it by hand choosing specific floral accents to use. Follow these steps to create a design you’ll be proud to hang for years to come. The materials required are three filler flower sprigs, two pieces of greenery, one main flower, a metal loop {pictured is a 12” loop}, floral wire, and ribbon. For tools, a wire cutter, scissors, and a hot glue gun. Begin by trimming the stems and removing unnecessary leaves and arranging the flowers on the loop. Take the sprigs of greenery and wire each one onto the loop, followed by the filler flowers. Lastly, add the main flower wherever you see fit and add a ribbon to the top of the loop for hanging.
Build Industrial Shelves
Industrial-style decor has become a favorite in homes across the nation. Luckily, there’s an easy way to get in on some of that industrial action in your home. DIY industrial shelves are easy to make and can be customized to any wall space regardless of the size. With a few tweaks, your plain shelves can be the conversation pieces of the room. The first step is to sketch out the size and layout of the shelves you want to make. This tutorial shows you how to make two 16″ wooden shelves with two brackets per shelf. Each bracket uses ready cut pieces of pipe. If you need custom sizes, the pipe can be cut down and threaded at most local home improvement stores. The supplies needed are a reclaimed pine shelf, wood sealant, ½” black pipe x 4, 4” long, ½” black pipe x 4, 2” long, ½” floor flanges x 8 and ½” black elbows x 4. The tools needed are a table saw, drill, sanding block, screwdriver, and a pipe wrench.
Try New Hardware Handles
If you find you’re becoming relentless with your furniture, one of the easiest ways to make a significant impact on a room is to update any furniture in your home with new handles. Knobs and drawer pulls can be found online and most home decor shops. Before heading to the store, count the number of knobs you’ll need to replace. Taking a photo of the entire room will come in handy when considering what colors and styles work best with your palette. Measure the distance between the attachment points on pulls. The hardware will list this as the “Center to Center” dimension, or “CC”, or “drill centers.” You’ll save yourself time and trouble by buying new pulls with the same CC, otherwise, you’re looking at filling the existing holes and drilling new ones. Take usability and function into consideration. If you access a drawer several times a day, you’ll want something easy and comfortable to grip. For a kitchen. Knobs that have a sleek finish and are easy to clean work best. Marble, brass, crystal, leather — there are endless statement-making options to accessorize your pieces. Lastly, buy a few extra knobs/drawer pulls just in case.
Transfer a Photo Onto a Block of Wood
The concept of making a photo magically appear on a block of wood may seem mystifying but fret not, it’s a lot easier than you may think. This guide will show you some crafty ways to transfer images onto a wide variety of different surfaces. What you’ll need is access to a regular ink-jet printer, wax paper or freezer paper, and a credit card. For a wax paper image transfer, start by cutting a piece of the wax paper which is the right size to fit inside your printer. As you are applying this as a transfer, the image you are applying will need to be reversed. Make sure that the wax paper is fed properly through the printer, any wrinkles could affect the finished design. Place the wax paper down onto the item you wish to print on, and use the credit card to transfer the image to the item. The entire process takes about 10 minutes.
Use Bookends as Floating Bookshelves
Storage space can get tricky at times, especially when it’s limited {specifically in Hoboken + JC-sized apartments}. Here is the perfect opportunity to get creative with what you may already have. If you have an obscene amount of books, just hang them on the wall, literally. Upcycle metal bookends into floating shelves for your books and in turn create a unique display on your wall. As shown in the tutorial linked below, use tin snip pliers to make two little notches and fold them with regular pliers. These little pieces of metal will be used to hold the back cover of the first book. The first book in this configuration will have to be thick enough to cover the piece of metal. To attach on the wall, two holes using a drill. For dry walls, two anchors for the screws will be needed.
Create a Mini Terrarium in a Jar
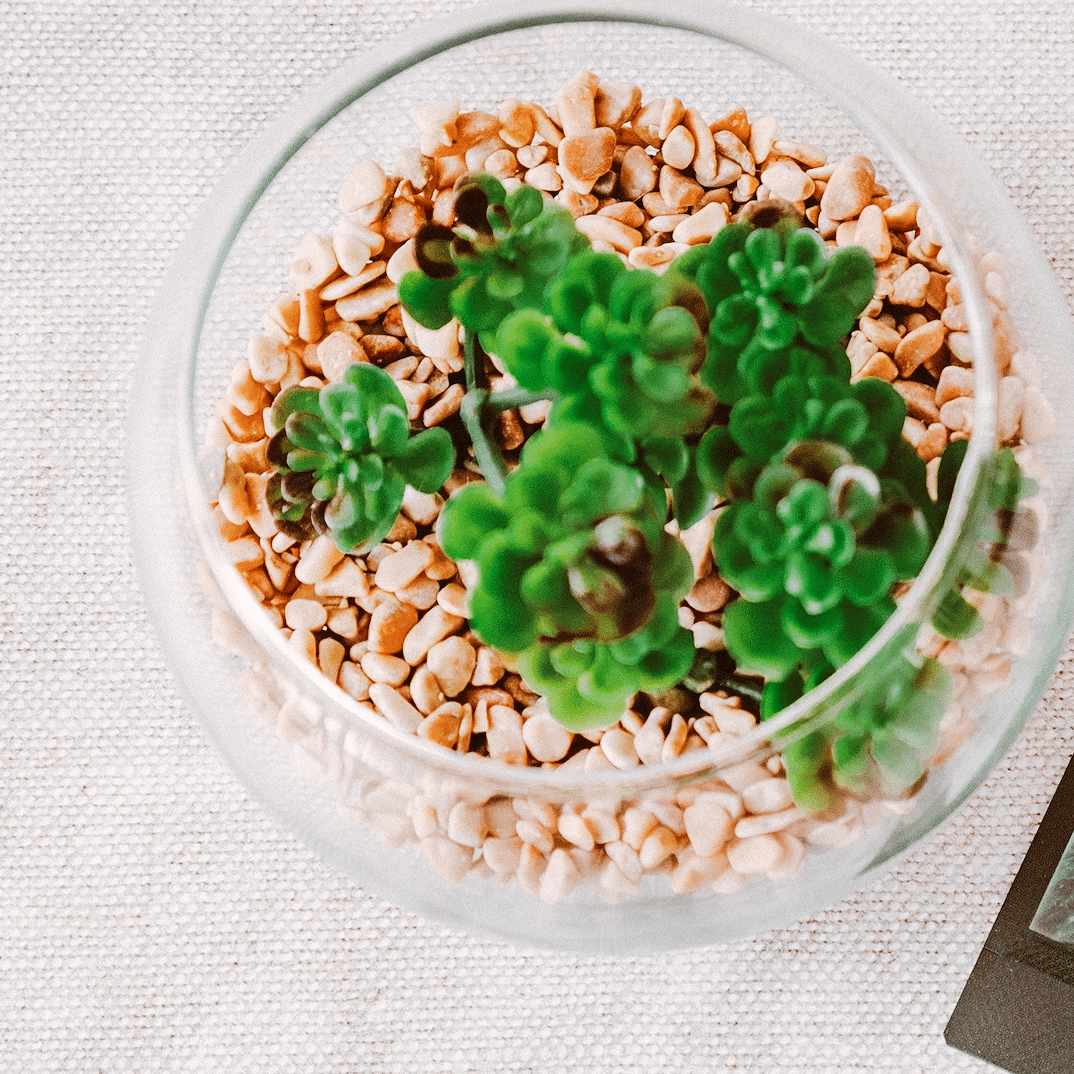
Happiness in a jar is the only way to describe it. Indoor gardening with terrariums is a fun and attractive way to incorporate plants into any home decor and you don’t need a green thumb to take care of them. Picture yourself on a hike or in an enchanting forest and then recreate that scenery inside your jar using succulents, stones, and little trinkets. This fun project is kid-friendly as well. Start with a medium, clear glass jar, a recycled one works perfectly. Fill the bottom of the jar with a small layer of activated charcoal that can be found at a floral/garden shop. Add a 1-inch layer of gravel or small rocks for drainage then a thick layer of potting soil. Then, plant small ferns, succulents, or even cacti in your soil. You want to keep about one plant per 1-inch diameter, if possible. Once you have your plants planted, add a small layer of decorative rocks, moss, or sand, and lastly, your small extras to make it personal.
Add Nail Polish to Keys to Distinguish Them
This project might be the most helpful and easiest project on the list. No more spending time looking for the right key for the right door, thanks to this life hack. Your keys can be organized and chic with the help of reliable ol’ nail polish, and don’t be afraid to play with fun designs. Choose your desired colors and begin. Try associating the colors with the locations they belong to instead of painting them randomly and attempting to memorize them by color. The materials needed are painters tape, acrylic paint, and fine point paintbrushes. Using painters tape, tape across the bottom part of the key to make a straight line. Using a small paintbrush, paint the key top light pink {in this example} and let dry. For the polka dot keys, use your thin paintbrush to add white and hot pink dots to your pink key top.
Hem and Take-In a Dress You Were Going to Take to a Tailor
Save yourself a trip, money, and the wait by altering your clothes at home. It’s one of the best things you can do to look sharp without taking trips to the tailor every month. Consider it an investment in your wardrobe. What you’ll need is a ruler, calculator, scissors, chalk, thread, pins, and a standard sewing machine. Formal dresses are trickier, so this tutorial shows how to hem and take-in a more casual dress. Before doing any clothing alteration to get the most accurate tailored fit pre-wash and iron the clothing. Before you start chopping away at your dress you need to lay it down properly on a flat surface. Make sure you have plenty of room to work with. If your dress flares out a lot, use the floor. Step one is fitting your dress. As you wear your garment, mark {with chalk} or pin the sections that are loose and need to be taken in. You only have to mark one side of the dress and get the exact measurements, as you will simply duplicate it for the other side when stitching. Next, divide the total measurements by the number of marks and seams. Separate the upper and lower parts of the garment where the marks and seams are. While doing any clothing alterations is to keep your hem looking as close to the original as possible. Now to finish off your hem, fold the bottom of your dress in twice, making sure not to fold over the white line you marked because that is your length and give it a straight stitch.
Make Your Own Kombucha
Kombucha, the fizzy fermented tea that’s jam-packed with probiotics and antioxidants has taken the world by storm and now with these DIY kits, you can make your own. Making kombucha couldn’t be easier. All you need to do is brew a batch of sweet tea {with the included green tea and cane sugar} and ferment it with the included SCOBY {which stands for Symbiotic Colony of Bacteria and Yeast}. The kit includes ½ gallon glass fermenting jar, kombucha SCOBY, kombucha starter liquid, cane sugar, premium green tea, cloth cover, and a band. Kanibal & Co. {197 Montgomery Street, Jersey City} and Washington General {509 Washington Street, Hoboken} both have this one as well as other fun kits like a beer making kit, everything bagel and cream cheese kit, goat cheese kit, soft pretzel kit, fermented hot sauce kit, and more.
Read More: This Reese’s Puff Pancake Recipe Will Up Your Flackjacks Game x 1000
Transform a T-Shirt Into a Tank Top
Start this process by purging your closet and as Marie Kondo puts it, get rid of anything that doesn’t spark joy when you hold it. Now, take one of your favorite t-shirts {a graphic tee or otherwise} and transform it into something brand new — a tank top. There are a whopping two materials needed, a t-shirt and a pair of scissors. The entire process takes about twenty minutes. Start by cutting away the ribbed neckline, bottom hem, and the sleeves starting from the shoulder and curving into the waist. Determine how low you want your front neckline, and cut away. Flip the shirt over and make a narrow racerback, curving inward from the armpits. Then cut a deep “V” shape from the top neckline. Using the excess bottom hemline, stretch it out until it becomes one long string of fabric. Knot the string a couple of inches above the bottom of the “V” shape. Wrap the string all the way down around the center of the racerback, and back up to meet the other ends. Knot the ends together tightly and trim the loose ends. To give your tank a high-low look, lay your shirt sideways, flattening it out evenly. Starting a few inches up at the front of your shirt, start cutting diagonally until you reach the back and voila. Not only is it good for the environment but it gives you the opportunity to fall in love with your pieces again.
Create Faux Granite Coasters
These make the perfect gift but be sure to make yourself a set too. Get creative with the colors and patterns. This is also a project that is kid-friendly (with supervision), so the little ones can get involved too. All it takes is a few materials and simple steps. This tutorial walks you through the process. The artist used a cookie pan with aluminum foil on top as the surface for the project. They placed the small standard white tiles on the foil and began scribbling on them with different colored permanent markers. Next, you add an even layer of alcohol on top and burn the tile using a lighter. After the small flame fizzles out on its own, she lightly spritzed it with alcohol once more and lit the flame again to create a smooth, granite look. If it didn’t come out as you hoped, you can clean it off with alcohol and begin again.
For some, DIY projects provide an outlet to express creativity and for others, they are simply the most economical option, but either way, they can be fun and force you to live in the moment.
Which of these projects will you be doing this weekend? Let us know in the comments!

Did you know: We started a podcast about all things news and lifestyle in Hoboken + Jersey City! Listen to the latest episode of Tea on the Hudson here and subscribe.